AWS FinOps in 2026: Cost Optimization with the Well-Architected Framework
I’ve watched too many teams misunderstand FinOps. They think it means shutting down instances at night or buying bigger discounts. That’s not FinOps. That’s panic cost-cutting. Real FinOps is about building a culture where engineers understand the cost implications of their architectural choices the same way they understand latency or throughput. When a developer picks an instance type, they should think about both performance and cost in the same breath.
The AWS Well-Architected Framework gives you a structured way to make that happen. The Cost Optimization pillar specifically lays out five key practices that actually work when you implement them right.
What FinOps is actually about
FinOps stands for Financial Operations. It’s a discipline that puts engineering, finance, and business teams in the same room to make cost-driven architectural decisions. The outcome isn’t always “cheaper.” Sometimes the right call is to spend more money on a better solution.
What FinOps isn’t: turning off your database at midnight, deleting old logs, or negotiating with your AWS account manager for a bigger discount. Those are tactics. They might save 5% here and 10% there, but they don’t address why your bill went from $40K to $180K in six months.
The actual magic happens when your team measures. You install cost monitoring, tag everything, set budgets, and let the data inform architecture. An engineer considering whether to use EC2 versus Lambda should be able to run the numbers through a cost calculator before they write the first line of code. That’s FinOps.
Five practices from the Cost Optimization pillar
AWS built the Well-Architected Framework pillar on observation. They’ve seen thousands of customer bills. These five practices are what the winners actually do.
Practice one is to implement cloud financial management. That sounds bureaucratic. What it means: establish governance. Assign ownership. Create dashboards that engineers actually look at. If no one knows how much the database costs per query, you have zero visibility into whether you’re making good decisions.
Practice two involves implementing usage monitoring. Tag your resources. Use AWS Cost Explorer to slice and dice spending by team, by project, by environment. I’ve seen teams spend weeks wondering why their bill spiked only to discover that someone deployed a test environment to production and never shut it down. Proper tagging catches that in hours.
Practice three is about decommissioning resources. Old databases. Snapshots from last year. That test Lambda function no one calls anymore. They accumulate. One team I worked with found they were paying for 47 unattached EBS volumes. Forty-seven. That’s not a cost optimization problem. That’s a discipline problem. You need processes to kill infrastructure that isn’t earning its keep.
Practice four focuses on optimizing over time. Your bill isn’t static. Workloads change. Performance characteristics shift. What made sense six months ago might be suboptimal today. You schedule regular reviews—quarterly at minimum. Run the tools AWS gives you. Act on the recommendations.
Practice five is purchasing options. Reserved Instances, Savings Plans, Spot Instances. These aren’t silver bullets. They’re tools. You need to understand when each one makes sense for your workload.
Right-sizing: where most teams go wrong
Right-sizing is the single biggest cost optimization lever. An over-provisioned instance costs you money every hour it’s running, and it’s completely invisible until you look for it.
AWS has the Compute Optimizer. Run it. It looks at actual CPU, memory, and network utilization over the past 14 days and recommends instance types that match what you’re actually using. Some teams fear this because they assume recommendations mean downtime. That’s only true if you’re not careful.
Get the recommendations with this AWS CLI command:
aws compute-optimizer get-ec2-instance-recommendations \
  --region us-east-1 \
  --query 'instanceRecommendations[*].[instanceArn, currentInstanceType, recommendationOptions[0].instanceType, recommendationOptions[0].savingsOpportunity.savingsOpportunityPercentage]' \
  --output table
This gives you the ARN, current instance type, recommended type, and percentage savings. For each recommendation, you then need to decide: can I safely change this instance type without impacting the application?
The process matters. You don’t just change instance types in production at 2 p.m. on a Tuesday. You test in staging first. You understand what workloads are actually running. Then you schedule a maintenance window or use an auto-scaling group with a rolling deployment to make the change with zero downtime.
I’ve seen teams move from m5.2xlarge to m5.xlarge and save 50% on compute. Others find they’re actually underprovisioned and need to add memory. The point isn’t to go smaller. It’s to match the instance to the workload.
Savings Plans versus Reserved Instances in 2026
The discount options have matured. Reserved Instances used to be the only game in town. Savings Plans changed that, and in 2026 they’re the better choice for most workloads.
Reserved Instances lock you into a specific instance type in a specific region for one or three years. You get a discount—typically 40% for three years, about 30% for one year. The problem: if you need to change instance types, you’re stuck. You own the commitment. You can sell it on the marketplace, but that adds friction.
Compute Savings Plans give you flexibility. You commit to spending a certain amount per hour on any instance type or family within a region. Need to shift from m5 to m6i? No problem. Need to run a mix of instances? It works. You still get roughly 30-40% off on-demand pricing depending on your commitment length.
There are also EC2 Instance Savings Plans, which are somewhere in between. They lock you into the instance family (like t3) but let you change size and OS. These give you about 35% off.
When should you use Reserved Instances? When you have a stable, predictable workload that won’t change. A data warehouse that runs the same query pattern 24/7 for three years? Reserved Instance. A development cluster where engineers spin up and tear down instances constantly? Terrible fit.
For most modern architectures, Compute Savings Plans win because they’re flexible. You keep pace with optimization without being penalized for changing instance types.
How do you buy them? Through the console, or programmatically:
aws ec2 purchase-scheduled-instances \
  --region us-east-1 \
  --purchasing-token token123 \
  --scheduled-instance-count 1
More commonly, you’d use the console to browse available options, see projected savings, and commit. The AWS pricing calculator shows you the math before you commit. Use it.
S3 cost traps that catch everyone
S3 is cheap until it isn’t. Storage per GB is pennies. But the other costs are where surprises live.
Start with storage class. S3 Standard is expensive for cold data. S3 Intelligent-Tiering automatically moves objects between access tiers based on retrieval patterns. If you have a mix of hot and cold data and you’re not sure how the split will evolve, Intelligent-Tiering is your move. You pay a small monitoring fee, but you avoid the scenario where someone stores a 10 TB dataset in Standard that gets accessed once every six months.
For data you know is cold—backups, archives, compliance storage—S3 Glacier Instant Retrieval is the play. Retrieval latency is measured in milliseconds, not hours. It costs less than Standard but more than Deep Archive. I’ve seen teams use Glacier Instant Retrieval for backups and cut storage costs by 70%.
Then there are request costs. GET requests, PUT requests, LIST operations. These add up. A workload that does 10 million LIST operations per month against a bucket with millions of objects? That’s $50-100 in request costs alone, depending on region. Most teams don’t see that line item until they look.
S3 Inventory and S3 Analytics can help you understand your actual access patterns. Run an inventory job monthly. Analyze which objects are actually being accessed. Then move the cold stuff to Glacier.
Data transfer is another hidden cost. If you’re transferring data out of S3 to the internet (not to other AWS services in the same region), you pay $0.09/GB. A 100 GB download costs $9. A terabyte costs $90. If you have a workload that regularly downloads large objects, that’s a significant line item.
Use VPC endpoints for S3 (more on this below) to avoid NAT Gateway charges if you’re accessing from EC2 in a private subnet. Or consider CloudFront if you’re serving the same objects repeatedly—you pay less for egress through CloudFront than through S3 directly.
Data transfer costs: the AWS line item that surprises everyone
Everyone understands compute and storage. No one thinks about data transfer until the bill arrives.
Here’s how it works: traffic within the same region between AWS services (like EC2 to S3) is free. Traffic between regions? $0.02/GB. Traffic from AWS to the internet? $0.09/GB (varies by region, but roughly). Traffic into AWS from the internet? Free.
The killer is often NAT Gateway. If you have EC2 instances in a private subnet that need internet access, you run traffic through a NAT Gateway. AWS charges you for every gigabyte that passes through it: $0.045/GB in most regions, plus $0.32 per hour for the gateway itself.
I worked with a team that had a batch processing job that needed to call an external API. They routed all traffic through a single NAT Gateway. One day they ran a larger-than-usual batch. The data transfer bill was $480. For one day.
The fix: VPC endpoints. For AWS services, use a gateway endpoint. S3 and DynamoDB are the big wins because they tend to move a lot of data.
Here’s how to create an S3 gateway endpoint:
aws ec2 create-vpc-endpoint \
  --vpc-id vpc-12345678 \
  --service-name com.amazonaws.us-east-1.s3 \
  --route-table-ids rtb-12345678 \
  --vpc-endpoint-type Gateway
Once the endpoint exists, S3 traffic from your private subnet to the S3 bucket in the same region flows through the endpoint. Zero data transfer charges. The endpoint itself is free. You just pay for the data you store in S3.
For services that don’t have gateway endpoints (most of them), use an interface endpoint. Those cost $0.01/GB for data processing plus $0.007 per endpoint-hour. For a workload that transfers a lot of data to an external API or service, an interface endpoint is still cheaper than NAT Gateway.
Tag governance: making cost allocation automatic
You can’t optimize what you don’t measure. Tags are how you measure at scale.
Mandatory tags enforced at the infrastructure layer. Every resource must have a cost-center tag, an environment tag, and a project tag. Without these, you can’t allocate costs to anyone. You don’t know if Kubernetes Pod X is billing to the platform team or the ML team.
AWS Config rules can enforce this. Here’s a Config rule that checks whether resources have a required tag:
{
  "ConfigRuleName": "required-tags",
  "Description": "Checks whether resources have required tags",
  "Scope": {
    "ComplianceResourceTypes": [
      "AWS::EC2::Instance",
      "AWS::S3::Bucket",
      "AWS::RDS::DBInstance",
      "AWS::Lambda::Function"
    ]
  },
  "Source": {
    "Owner": "AWS",
    "SourceIdentifier": "REQUIRED_TAGS",
    "SourceDetails": [
      {
        "EventSource": "aws.config",
        "MessageType": "ConfigurationItemChangeNotification"
      }
    ]
  },
  "ConfigRuleState": "ACTIVE",
  "TagKeyScope": "cost-center,environment,project"
}
This rule fires every time someone creates an EC2 instance, S3 bucket, RDS database, or Lambda function. If the resource doesn’t have the required tags, the Config rule reports a violation.
But enforcement is better than just reporting. Use a Service Control Policy to prevent resource creation without the right tags:
{
  "Version": "2012-10-17",
  "Statement": [
    {
      "Effect": "Deny",
      "Action": [
        "ec2:RunInstances",
        "s3:CreateBucket",
        "rds:CreateDBInstance"
      ],
      "Resource": "*",
      "Condition": {
        "StringEquals": {
          "aws:RequestTag/cost-center": "",
          "aws:RequestTag/environment": "",
          "aws:RequestTag/project": ""
        }
      }
    }
  ]
}
This SCP denies instance creation unless the request includes the required tags. It’s a hard gate. Engineers can’t bypass it. They have to tag before they can provision.
Once tags are in place, AWS Cost Explorer automatically allocates costs to your dimensions. Want to know what the platform team spent last month? Run a query against cost-center=platform. The data is there, fresh, every day.
AWS Cost Anomaly Detection: catching surprises
Cost Anomaly Detection uses machine learning to spot unusual spending patterns. You define the sensitivity (low, medium, high) and the frequency (daily, weekly). When your spend deviates from the baseline in a way that looks anomalous, AWS sends you an SNS notification.
The setup is simple:
aws ce create-anomaly-monitor \
  --anomaly-monitor '{
    "MonitorName": "my-anomaly-monitor",
    "MonitorSpecification": {
      "Or": [
        {
          "Dimensions": {
            "Key": "SERVICE",
            "Values": ["Amazon Elastic Compute Cloud - Compute"]
          }
        }
      ]
    },
    "MonitorType": "DIMENSIONAL"
  }'
Then create a subscription to get alerts:
aws ce create-anomaly-subscription \
  --anomaly-subscription '{
    "SubscriptionName": "my-anomaly-sub",
    "Threshold": 100,
    "Frequency": "DAILY",
    "MonitorArnList": ["arn:aws:ce:us-east-1:123456789012:anomalymonitor/my-anomaly-monitor"],
    "SubscriptionArn": "arn:aws:sns:us-east-1:123456789012:my-sns-topic"
  }'
I set my threshold to $100 because I want to know about meaningful changes. A $5 variance in a $50K monthly bill isn’t interesting. But $100 means something changed.
The real win is that Cost Anomaly Detection catches things your human eyes miss. A rogue job that scales EC2 instances aggressively. A misconfigured data transfer that starts moving terabytes. A developer who left a NAT Gateway running in every availability zone instead of just one. These spike your bill gradually or suddenly. Anomaly Detection catches them before they become a crisis.
A practical example: one team got an alert at 3 a.m. EC2 spending jumped $200. Investigation revealed that a load test script didn’t have proper cleanup and was spawning instances continuously. Cost Anomaly Detection sent them an SNS alert to Slack. They stopped the script within an hour. Without it, that test would have cost $5K+ by Monday morning.
AWS Budgets plus SNS alerts
Budgets are different from Anomaly Detection. Budgets are proactive spending limits. You say “I want to spend $50K this month on compute” and AWS will alert you when you hit 80%, 90%, and 100%.
Set up a budget:
aws budgets create-budget \
  --account-id 123456789012 \
  --budget '{
    "BudgetName": "compute-monthly",
    "BudgetType": "MONTHLY",
    "TimeUnit": "MONTHLY",
    "BudgetLimit": {
      "Amount": "50000",
      "Unit": "USD"
    },
    "CostFilters": {
      "Service": ["Amazon Elastic Compute Cloud - Compute"]
    }
  }'
Then create notifications:
aws budgets create-notification \
  --account-id 123456789012 \
  --budget-name compute-monthly \
  --notification '{
    "NotificationType": "ACTUAL",
    "ComparisonOperator": "GREATER_THAN",
    "Threshold": 80,
    "ThresholdType": "PERCENTAGE",
    "NotificationState": "ENABLED"
  }' \
  --subscribers-list '{
    "SNSTopic": "arn:aws:sns:us-east-1:123456789012:cost-alerts"
  }'
This creates a budget and a notification that fires when actual spending exceeds 80% of your $50K limit. Wire it up to Slack or your incident management system so the team sees it in real time, not in next week’s retrospective.
The key is making budgets matter. If you set a budget and never act on the alerts, it’s just noise. If you set a budget and have a process where the team pauses non-critical work when you’re approaching the limit, budgets actually constrain spending.
Graviton3: the 20-40% compute discount everyone’s sleeping on
Graviton3 processors are ARM-based chips designed by AWS. For most workloads, they’re cheaper than Intel or AMD x86 processors. Specifically, 20-40% cheaper on compute cost while delivering similar or better performance.
The catch: your software has to run on ARM. Most do. Python, Node, Java, Go—they all work great on Graviton3. Compiled languages that target x86 specifically, or software with native x86 dependencies, won’t run without recompilation.
I’ve seen teams move Kubernetes clusters from t3 instances (Intel) to t4g instances (Graviton3) and cut compute costs by 30% with zero application changes. The containers are already Linux-based, already architecture-agnostic.
The migration is straightforward. Add an auto-scaling group with t4g instances. Drain the old t3 nodes. Run a few weeks with both. See if anything breaks. If the dashboard metrics look the same and error rates are flat, you just reduced your bill by 30%.
Not every workload is a good fit. I/O-intensive workloads sometimes perform differently on ARM. But for web servers, APIs, batch processing, data analysis—try it. The math works.
The cultural piece: who owns cost?
Here’s what I’ve learned: the technical approach matters less than the organizational approach.
Teams where finance owns cost optimization fail. Finance doesn’t understand that refactoring a query saves $10K/month more than buying Reserved Instances. Finance sees cost as a line item to minimize. Engineers see it as a side effect of building the right architecture.
Teams where engineers own cost optimization win. An engineer thinks about cost during architecture review. They know approximately how much an instance costs. They understand that S3 Intelligent-Tiering costs less for mixed workloads. They care because the optimization aligns with building better systems.
The structure that works: engineers are responsible for their service costs. Finance provides visibility and governance. Cost is reviewed every month alongside performance and reliability. Bad cost performance is treated the same way you’d treat a memory leak—you investigate and fix it.
This is where the Well-Architected Framework’s Cost Optimization pillar shines. It’s not about technical controls. It’s about embedding cost awareness into your architecture review process. When a team proposes a new architecture, they should be able to articulate not just “this will be fast” but “this will cost X per month and we’ve optimized for this set of trade-offs.”
That’s FinOps. The technical tools—Compute Optimizer, Cost Anomaly Detection, Savings Plans, Graviton3—are just enablers. The real work is changing how teams think about infrastructure.
What’s next
Start with measurement. Get Cost Explorer running. Tag your resources. You can’t optimize what you don’t measure.
Run Compute Optimizer and act on the recommendations in non-critical environments first. Once you’re confident the process works, scale it.
Set up Cost Anomaly Detection and a budget with SNS alerts. Let the data flow to your incident management channel. Make cost visibility a daily habit.
Consider a migration path to Graviton3 for your standard workloads. The math is compelling and the risk is low.
Most importantly, build a culture where engineers own cost as part of their core responsibility. The Well-Architected Framework gives you the structure. The tools give you the visibility. The culture makes it stick.
If you’re managing infrastructure as code with Terraform or OpenTofu, consider automating your Savings Plans purchasing and tag enforcement. That’s where infrastructure as code pipelines really earn their keep. And if you’re running a GitLab CI pipeline with Terraform, you can enforce cost governance every time someone proposes an infrastructure change.
The bill is data. Use it.
Explore more like this
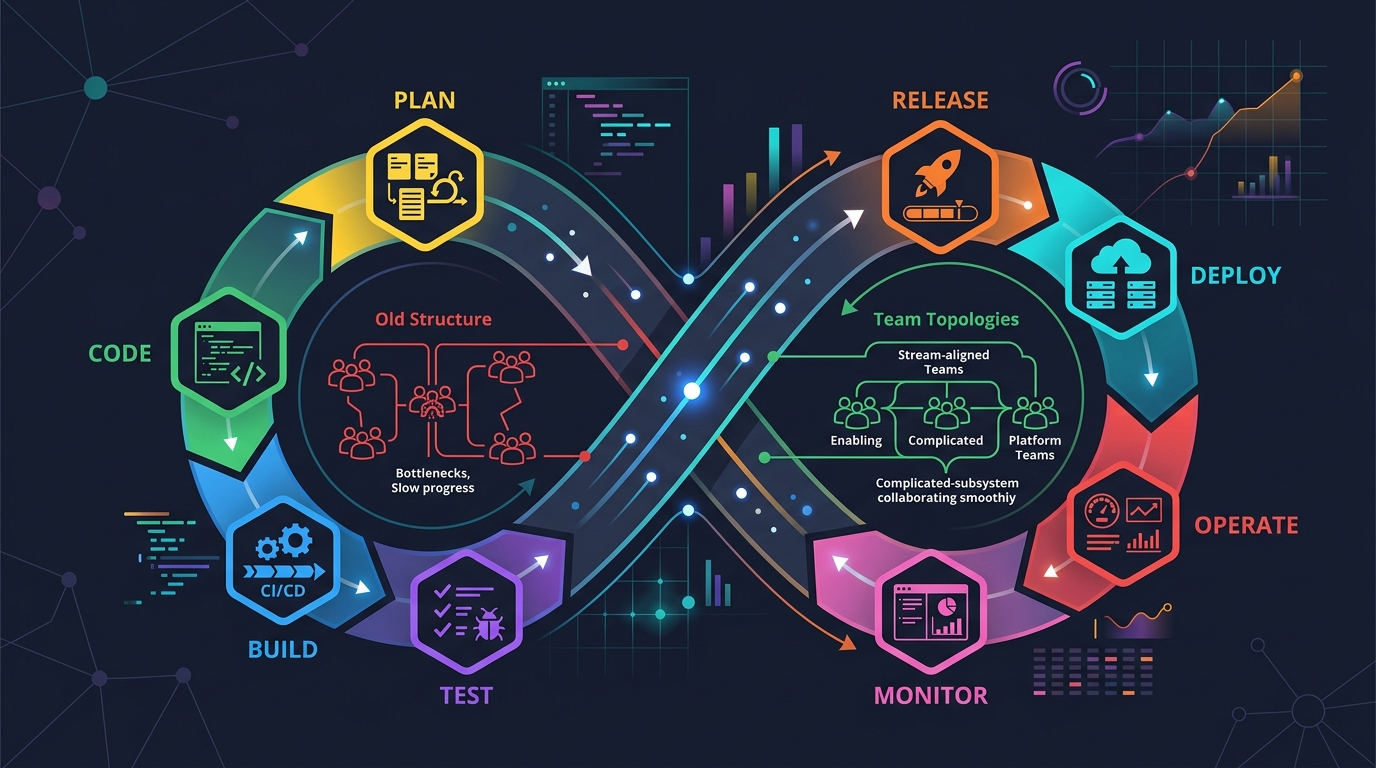
Scrum + Team Topologies: Why Your DevOps Team Structure Might Be Slowing You Down
I spent three years at a company that spent $4 million on “DevOps transformation.” New tools, new cloud infrastructure, training budgets, the works. The velocity of the platform stayed flat....
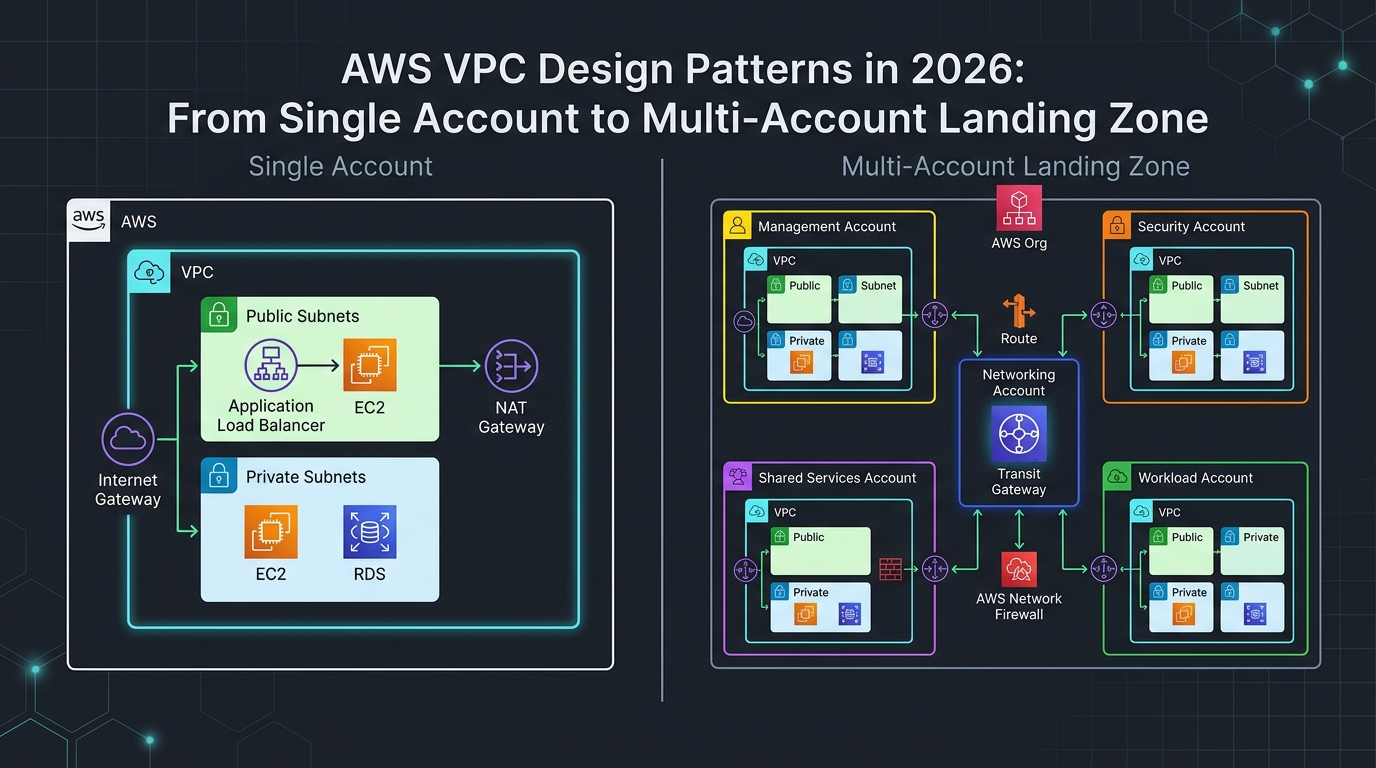
AWS VPC Design Patterns in 2026: From Single Account to Multi-Account Landing Zone
The VPC decisions you make on day one will follow you for years. I’ve lived through the consequences—redesigning a network that was built without proper CIDR planning, watching a simple...

Comments