Gitlab Remove Project – Faster and Secure Way

Removing Project on Gitlab that is not needed anymore can avoid mistakes and improve the developers’ productivity when they need to find projects. Keeping Gitlab organized and clean is always a good practice. Let’s learn how to remove Project on GitLab!
Developers shouldn’t take it lightly when they delete a GitLab project. After an administrator removes a Gitlab project, all associated resources are permanently deleted, and there is no way to recover them. Of course, you probably have a backup from your server, right? 🙂
Be aware that you need to remove a Gitlab Project because you need to create it again in another location. However, you don’t need to remove the Gitlab Project. You can move the project to another location as well.
Also, it’s possible to rename a specific branch on Gitlab.
Another essential piece of advice:
To remove a project on Gitlab, you have to be the owner or have the privileges of an administrator of Gitlab. If not, you can only see “rename project” but not “remove the project.”
Remove Gitlab Project
Let’s see the steps to remove the Gitlab project in 2021.
- Go to the project page. You must be in the project you want to delete.
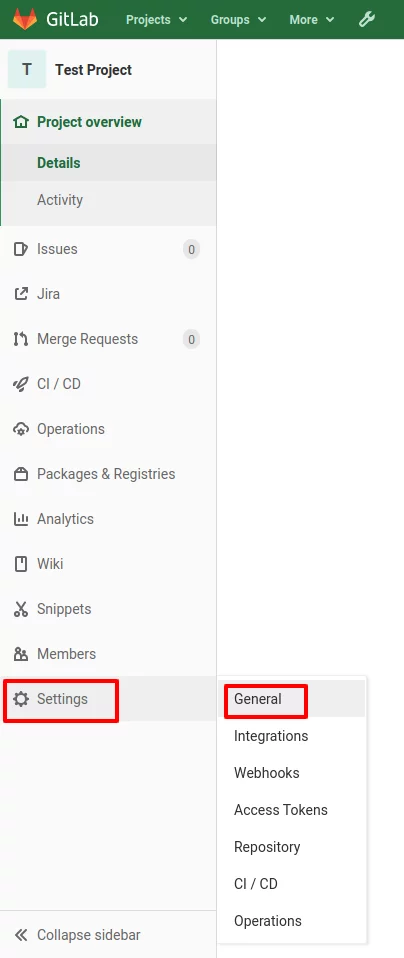
- Select “Settings”
- Select the “General” section
See the screenshot where are the “General” options:

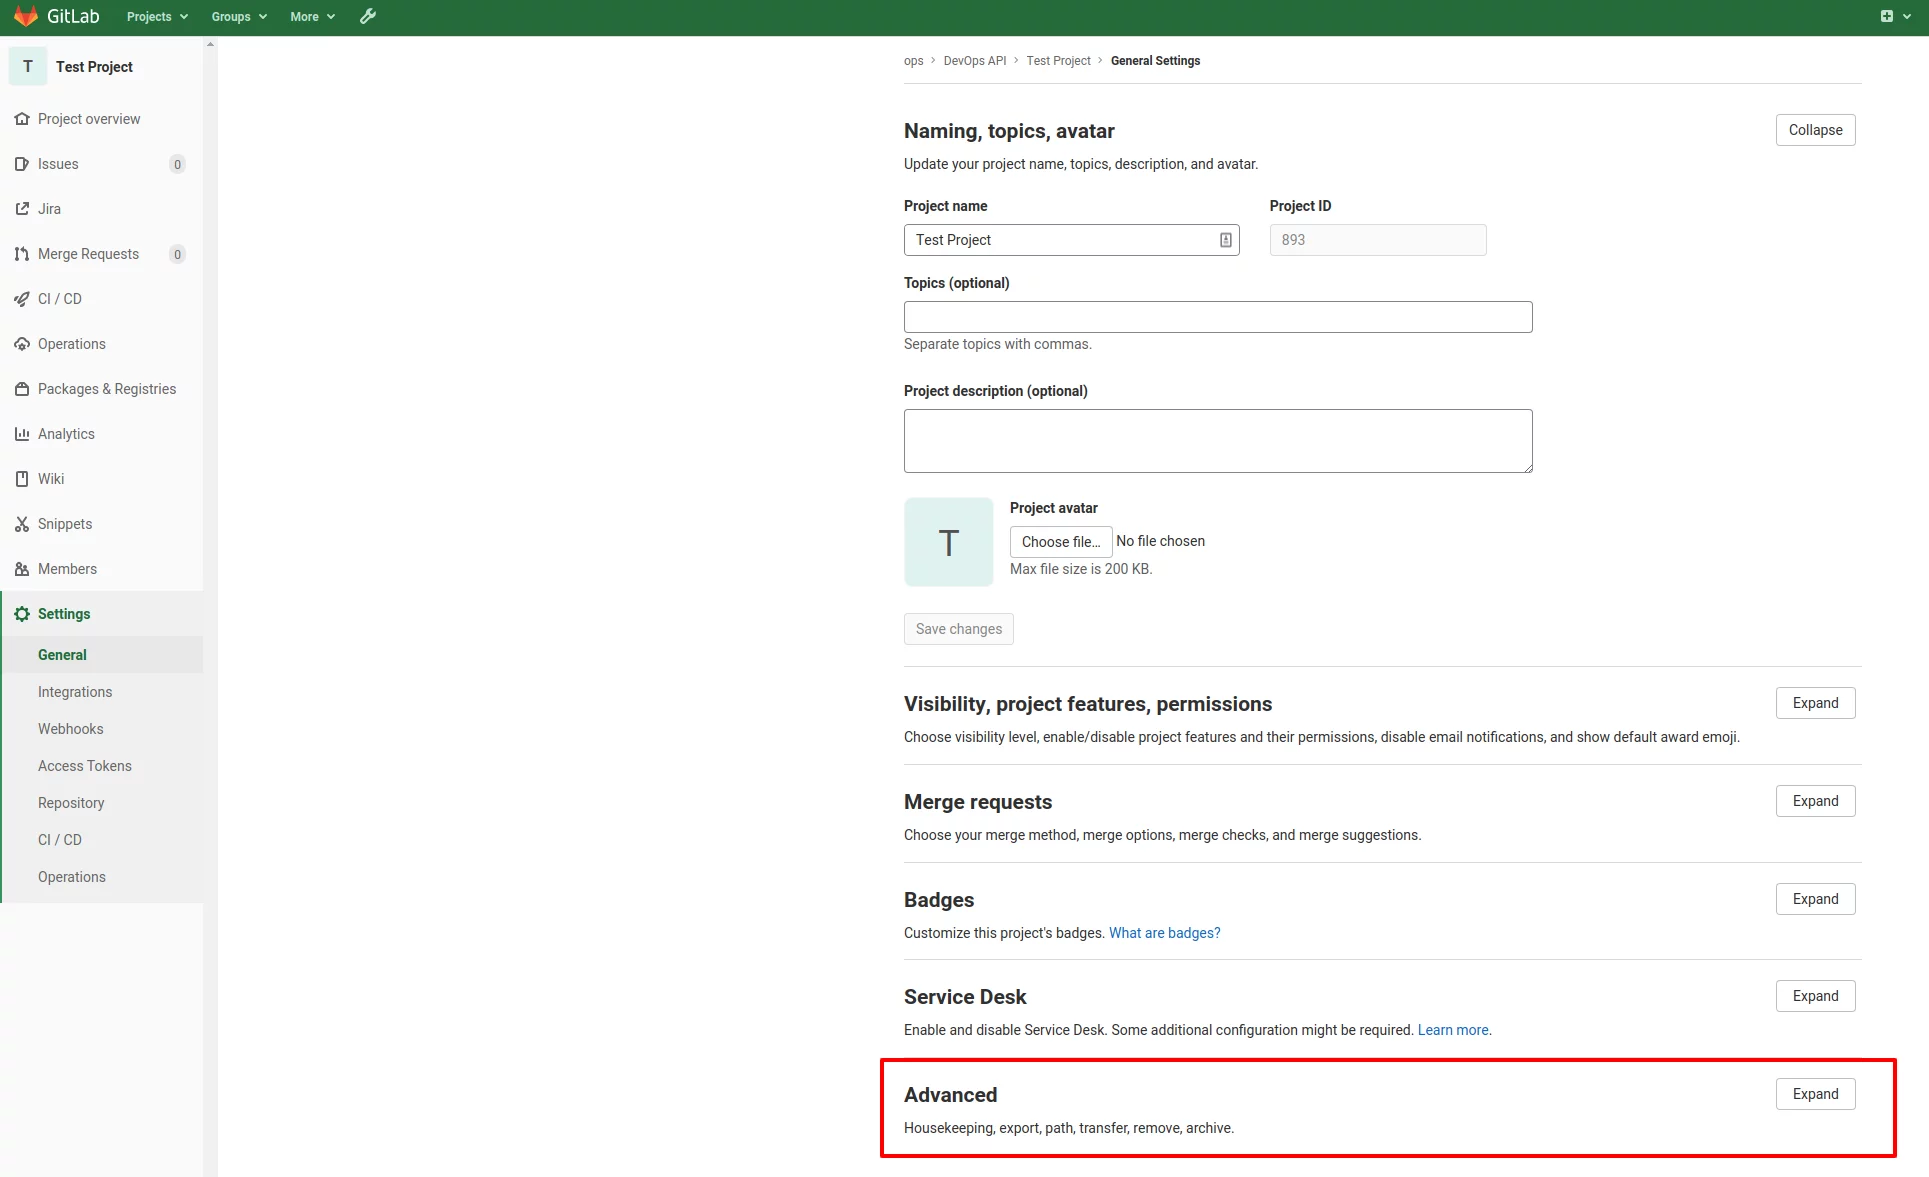
- If you have all rights, then at the bottom of the page will be a button for “Advanced settings” (i.e., project settings that may result in data loss) or “Delete Project” (in newer GitLab versions)

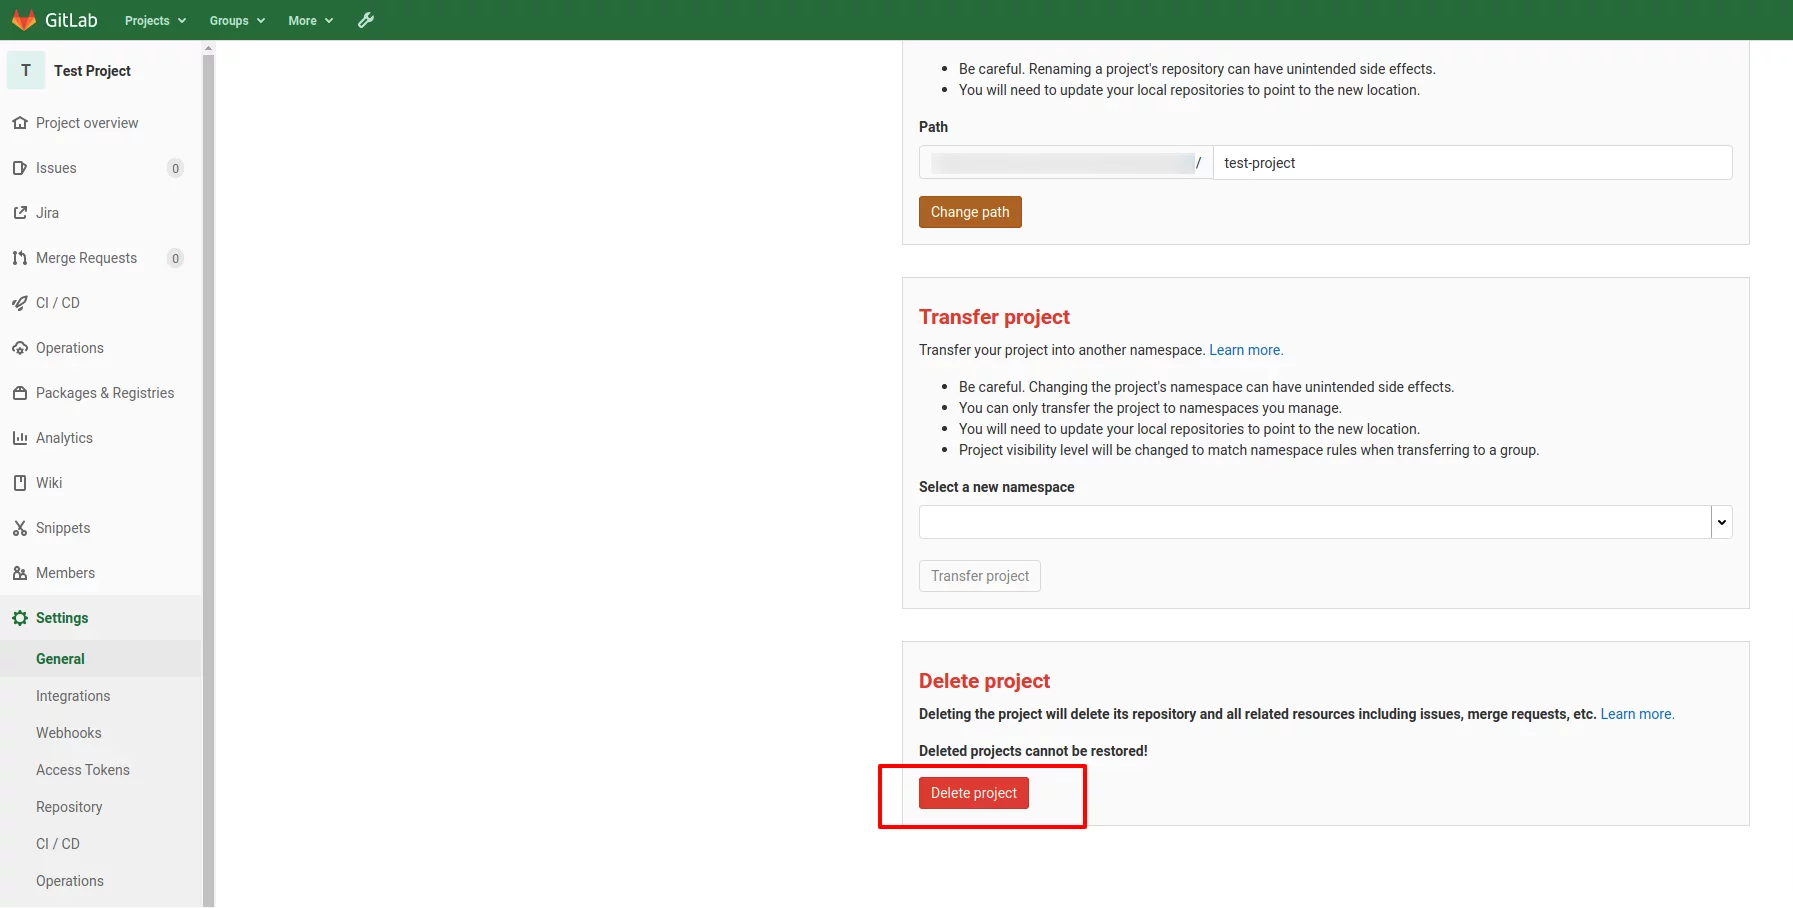
- Scroll Down, and find the button “Delete Project”.

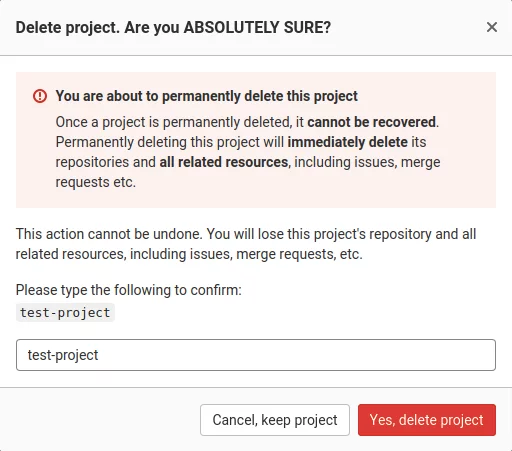
- Type the Project Name that you trying to remove on Gitlab.

Conclusion
Removing Gitlab Project is an easy task. However, it could be more challenging for new users to figure out the location from the menu options. Remember, we can’t find it if we don’t have the proper permission. Also, before deleting a project, ensure it is the right one.


Comments