GitLab CI Deploy to AWS: Elastic Beanstalk, ECS Fargate, and App Runner in 2026
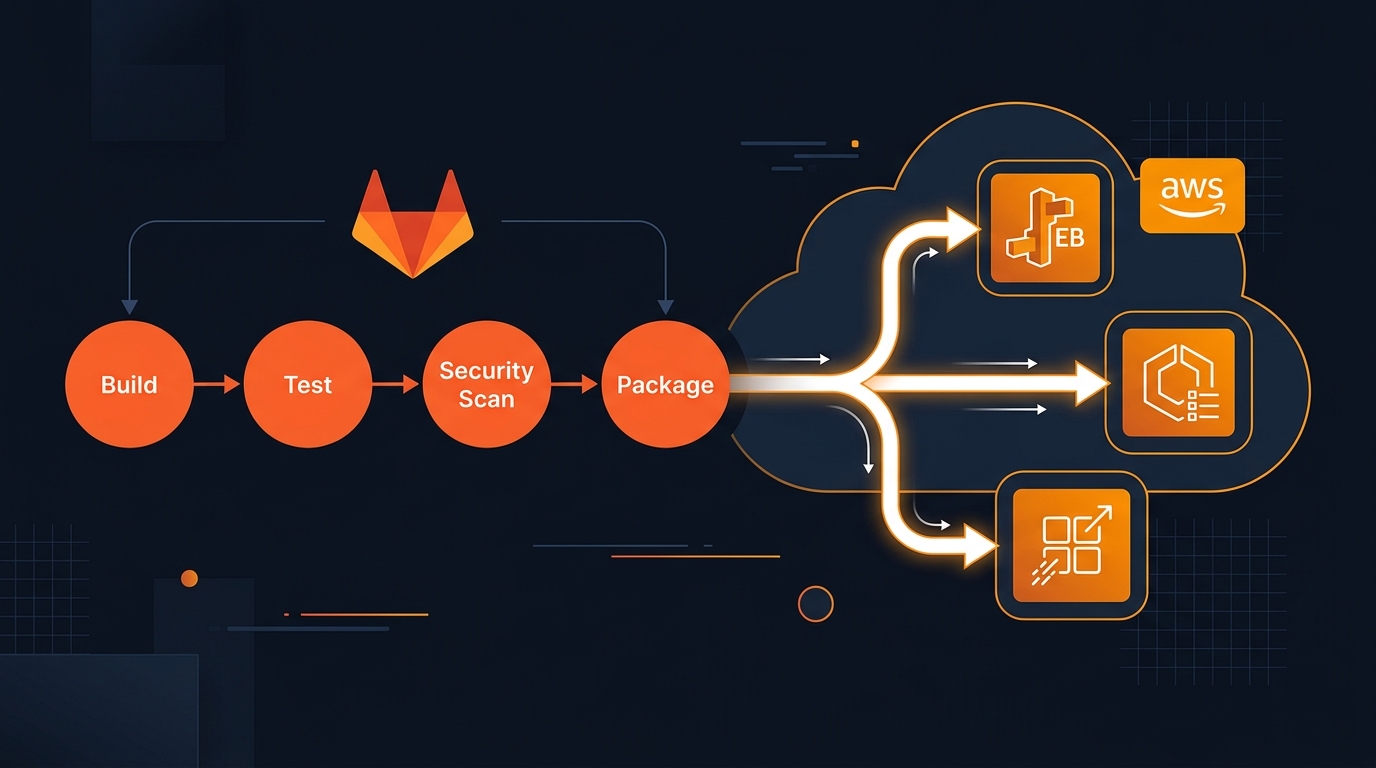
I’ve been deploying to AWS from GitLab CI for years. The patterns have shifted. In 2021 the answer was almost always Elastic Beanstalk — it was the lowest-friction path from “I have an app” to “it’s running on AWS.” In 2026, the answer depends on what you’re building and how much infrastructure you want to manage. You have three real options: Elastic Beanstalk, App Runner, and ECS Fargate. Each has a place.
This post walks through all three with working GitLab CI pipelines. I’ll also tell you when I’d reach for each one.
The AWS Deployment Options in 2026
Elastic Beanstalk is still here. AWS hasn’t deprecated it, but they’ve made it pretty clear it’s not where the investment is going. The feature pace dropped off years ago. EB still runs Docker, Node.js, Python, Java, Go, PHP, Ruby, .NET, and Tomcat — and it works. If you have existing workloads on EB that are stable, staying on it is a legitimate choice. For net-new projects, I’d evaluate the alternatives first.
App Runner is what I’d call the “just run my container” service. You push an image to ECR, App Runner takes it from there — provisions compute, manages scaling, handles HTTPS. There’s almost nothing to configure. The tradeoff is control: you don’t get to tune the networking, the task size options are limited, and at high request volume the cost model isn’t as predictable as EC2-backed options.
ECS Fargate is the production-grade option. You define task definitions, services, and a cluster. AWS runs the containers without you managing EC2 instances. The setup takes longer, but the operational model is solid and the control surface is high. Most serious containerized workloads I’ve seen end up here.
Elastic Beanstalk in 2026 — Still Works, Mostly
EB’s model is: you give it a ZIP file (or a Docker image), it provisions EC2 instances behind a load balancer, configures auto-scaling, and handles health monitoring. That mental model hasn’t changed since 2011.
What has aged: the EB CLI is creaky, the eb init interaction flow is awkward in CI environments, and the .ebextensions/ configuration system predates modern IaC approaches. You’ll spend more time debugging EB-specific quirks than you would with ECS.
That said, EB is a reasonable choice when:
- You’re migrating an existing EB application and the migration cost outweighs the benefit of switching
- Your team knows EB and the application is low-complexity
- You need the managed EC2 model (instance types, SSH access, etc.) without learning ECS
For new projects that just need to run a container — start with App Runner. For anything requiring production-grade orchestration, ECS Fargate.
GitLab CI Pipeline for Elastic Beanstalk
The key change from older EB pipelines is authentication. I stopped using long-lived AWS access keys stored as GitLab CI variables. The OIDC approach uses short-lived credentials tied to the specific job — much better security posture. GitLab’s id_tokens block generates a signed JWT that AWS accepts to assume a role.
Here’s what you need on the AWS side first: an IAM role with a trust policy that allows sts:AssumeRoleWithWebIdentity from your GitLab instance’s OIDC provider. The GitLab docs walk through the setup; it takes about 10 minutes.
deploy-beanstalk:
  stage: deploy
  image: python:3.12-slim
  id_tokens:
    AWS_OIDC_TOKEN:
      aud: https://gitlab.example.com
  before_script:
    - pip install awscli awsebcli
    - |
      export AWS_ROLE_ARN="arn:aws:iam::${AWS_ACCOUNT_ID}:role/gitlab-deploy-role"
      CREDS=$(aws sts assume-role-with-web-identity \
        --role-arn "$AWS_ROLE_ARN" \
        --role-session-name gitlab-ci \
        --web-identity-token "$AWS_OIDC_TOKEN" \
        --query 'Credentials.[AccessKeyId,SecretAccessKey,SessionToken]' \
        --output text)
      export AWS_ACCESS_KEY_ID=$(echo $CREDS | awk '{print $1}')
      export AWS_SECRET_ACCESS_KEY=$(echo $CREDS | awk '{print $2}')
      export AWS_SESSION_TOKEN=$(echo $CREDS | awk '{print $3}')
  script:
    - export BUNDLE="${CI_COMMIT_REF_NAME}-${CI_PIPELINE_ID}-$(date +%s).zip"
    - zip -r "$BUNDLE" . -x "*.git*"
    - aws s3 cp "$BUNDLE" "s3://${DEPLOY_BUCKET}/releases/$BUNDLE"
    - aws elasticbeanstalk create-application-version \
        --application-name "${APP_NAME}" \
        --version-label "${BUNDLE}" \
        --source-bundle "S3Bucket=${DEPLOY_BUCKET},S3Key=releases/${BUNDLE}"
    - eb init "${APP_NAME}" -p Docker --region "${AWS_REGION}"
    - eb deploy "${ENV_NAME}" --version "${BUNDLE}" --timeout 60
  environment:
    name: production
  when: manual
A few things worth calling out:
The bundle filename includes the branch name, pipeline ID, and a Unix timestamp. EB requires version labels to be unique across the application — if you reuse one, create-application-version throws an InvalidParameterValue error. The timestamp makes collisions essentially impossible.
eb deploy with --timeout 60 blocks until the deployment finishes or hits the timeout. The job output streams the deployment events, which means the pipeline result reflects the actual deploy outcome. I prefer this over update-environment which returns immediately and requires you to check the console manually.
Variables to define in GitLab CI (Settings → CI/CD → Variables):
AWS_ACCOUNT_ID— your 12-digit account IDAWS_REGION— e.g.us-east-1DEPLOY_BUCKET— the S3 bucket for application versionsAPP_NAME— Elastic Beanstalk application nameENV_NAME— Elastic Beanstalk environment name
GitLab CI Pipeline for AWS App Runner
App Runner is the simplest path for containerized web services. The deployment model is: build an image, push it to ECR, and App Runner detects the new image and deploys automatically. No explicit deploy step in the pipeline.
You configure App Runner once (in the console or via Terraform) to watch a specific ECR repository and tag. After that, every push to that tag triggers a new deployment. Your pipeline’s only job is building and pushing the image.
variables:
  ECR_REGISTRY: "${AWS_ACCOUNT_ID}.dkr.ecr.${AWS_REGION}.amazonaws.com"
  IMAGE_TAG: "${ECR_REGISTRY}/${APP_NAME}:${CI_COMMIT_SHORT_SHA}"

build-and-push:
  stage: build
  image: docker:cli
  id_tokens:
    AWS_OIDC_TOKEN:
      aud: https://gitlab.example.com
  script:
    - apk add --no-cache aws-cli
    - aws ecr get-login-password --region "$AWS_REGION" | \
        docker login --username AWS --password-stdin "$ECR_REGISTRY"
    - docker build -t "$IMAGE_TAG" .
    - docker push "$IMAGE_TAG"
    - docker tag "$IMAGE_TAG" "${ECR_REGISTRY}/${APP_NAME}:latest"
    - docker push "${ECR_REGISTRY}/${APP_NAME}:latest"
If App Runner is configured to track the latest tag, that second docker push triggers the deployment. The whole pipeline is short — build and push, done.
The OIDC authentication works the same way here as with the EB pipeline. One IAM role, one trust policy, credentials that expire after the job finishes. Check our post on AWS ECR authentication from GitLab CI for a deeper walkthrough of the ECR login flow.
App Runner pricing is request-based with a provisioned concurrency option. For low-to-medium traffic APIs, it’s often cheaper than ECS because you’re not paying for idle compute. At high sustained load, ECS Fargate or even EC2 tends to be more cost-efficient.
GitLab CI Pipeline for ECS Fargate
ECS is more involved but gives you full control. The deployment pattern I use in production: build the image, push to ECR, update the task definition with the new image tag, then tell ECS to roll it out.
The update-task-definition step is the part that trips people up. You can’t just change the image tag in-place — you register a new task definition revision, then update the service to use it.
build-and-push:
  stage: build
  image: docker:cli
  id_tokens:
    AWS_OIDC_TOKEN:
      aud: https://gitlab.example.com
  script:
    - apk add --no-cache aws-cli
    - aws ecr get-login-password --region "$AWS_REGION" | \
        docker login --username AWS --password-stdin "$ECR_REGISTRY"
    - docker build -t "$IMAGE_TAG" .
    - docker push "$IMAGE_TAG"

deploy-ecs:
  stage: deploy
  image: python:3.12-slim
  id_tokens:
    AWS_OIDC_TOKEN:
      aud: https://gitlab.example.com
  needs: [build-and-push]
  script:
    - pip install awscli
    - |
      # Assume role using OIDC token
      CREDS=$(aws sts assume-role-with-web-identity \
        --role-arn "arn:aws:iam::${AWS_ACCOUNT_ID}:role/gitlab-deploy-role" \
        --role-session-name gitlab-ci \
        --web-identity-token "$AWS_OIDC_TOKEN" \
        --query 'Credentials.[AccessKeyId,SecretAccessKey,SessionToken]' \
        --output text)
      export AWS_ACCESS_KEY_ID=$(echo $CREDS | awk '{print $1}')
      export AWS_SECRET_ACCESS_KEY=$(echo $CREDS | awk '{print $2}')
      export AWS_SESSION_TOKEN=$(echo $CREDS | awk '{print $3}')
    - |
      # Update task definition with new image
      TASK_DEF=$(aws ecs describe-task-definition --task-definition "${TASK_FAMILY}" --query 'taskDefinition')
      NEW_TASK_DEF=$(echo $TASK_DEF | python3 -c "
      import json, sys
      td = json.load(sys.stdin)
      td['containerDefinitions'][0]['image'] = '${IMAGE_TAG}'
      for k in ['taskDefinitionArn','revision','status','requiresAttributes','compatibilities','registeredAt','registeredBy']:
          td.pop(k, None)
      print(json.dumps(td))")
      NEW_ARN=$(aws ecs register-task-definition --cli-input-json "$NEW_TASK_DEF" \
        --query 'taskDefinition.taskDefinitionArn' --output text)
      aws ecs update-service \
        --cluster "${ECS_CLUSTER}" \
        --service "${ECS_SERVICE}" \
        --task-definition "$NEW_ARN" \
        --force-new-deployment
  environment:
    name: production
  when: manual
The Python snippet in the deploy step handles stripping the read-only fields from the existing task definition before registering the new revision. AWS won’t accept a task definition that still has taskDefinitionArn, revision, status, and a few other managed fields — they exist on the describe output but aren’t valid inputs for register. Removing them with a quick dict comprehension is cleaner than maintaining a template file.
--force-new-deployment on update-service tells ECS to roll out the new task definition even if it thinks nothing changed. Without it, ECS may not replace running tasks if the task definition ARN is the only difference it detects.
This pipeline doesn’t wait for the deployment to stabilize. For production deployments where you need to know the rollout completed successfully, add a aws ecs wait services-stable call after update-service:
aws ecs wait services-stable \
  --cluster "${ECS_CLUSTER}" \
  --services "${ECS_SERVICE}"
This blocks for up to 40 minutes (polling every 15 seconds) and exits non-zero if the service doesn’t reach a stable state. Adds a few minutes to the pipeline but gives you a real green/red signal.
Choosing Between the Three
Honest comparison based on what I’ve seen work in practice:
| Factor | Elastic Beanstalk | App Runner | ECS Fargate |
|---|---|---|---|
| Setup time | 30 min | 10 min | 1–2 hours |
| Container support | Yes (Docker platform) | Yes (primary use case) | Yes (native) |
| Traffic scaling | Auto Scaling Groups | Automatic | Task scaling |
| Cost model | EC2-based, predictable | Request-based | Task-based |
| Customization | Medium | Low | High |
| Active development | Minimal | Active | Active |
| Best for | Legacy migrations | Simple APIs/web apps | Production microservices |
My rule of thumb: if you’re building something new and it’s a web service or API — start with App Runner. The operational overhead is close to zero. If you need more control over networking (VPC configuration, service discovery, sidecars), ECS Fargate. If you’re already on Elastic Beanstalk and things are working, don’t migrate just because it’s 2026.
The one thing I’d change regardless of which service you’re on: stop using static access keys in CI. The OIDC approach works identically across all three options — same role assumption pattern, same GitLab id_tokens block. The credentials expire when the job ends. If a key leaks, there’s nothing to rotate.
Variables Reference
For any of these pipelines, the GitLab CI variables you need to define (Settings → CI/CD → Variables, marked as protected and masked):
| Variable | Used by | Description |
|---|---|---|
AWS_ACCOUNT_ID |
All | 12-digit AWS account ID |
AWS_REGION |
All | e.g. us-east-1 |
DEPLOY_BUCKET |
EB | S3 bucket for app version ZIPs |
APP_NAME |
EB, App Runner | Application/ECR repo name |
ENV_NAME |
EB | Elastic Beanstalk environment name |
TASK_FAMILY |
ECS | ECS task definition family name |
ECS_CLUSTER |
ECS | ECS cluster name |
ECS_SERVICE |
ECS | ECS service name |
Related Posts
If you’re building out the full pipeline:
- Build Docker images on GitLab CI and push to ECR — covers the Docker build stage in depth
- AWS ECR authentication from GitLab CI — ECR login patterns including OIDC
- GitLab CI Variables guide — how to structure your CI variables for multiple environments
- Run Terraform from GitLab CI — if you want to manage the EB/ECS/App Runner infrastructure as code
The deployment target is one piece. Getting the image built and authenticated correctly is where most of the time actually goes.
Explore more like this

Aurora Serverless v2 + Bedrock: AI Database Queries in 2026
I connected Bedrock to our Aurora cluster last month. The first thing I asked it was “show me all customers who churned in Q1 but came back in Q2” —...

Terraform State Locking with S3 and DynamoDB in 2026
The moment two engineers run terraform apply at the same time without state locking, you have a race condition that can corrupt your entire infrastructure state. Both processes read the...


Comments